Polymeric Sand vs Regular Sand: Which Is Right for Your North Carolina Pavers?

Updated: Aug 12
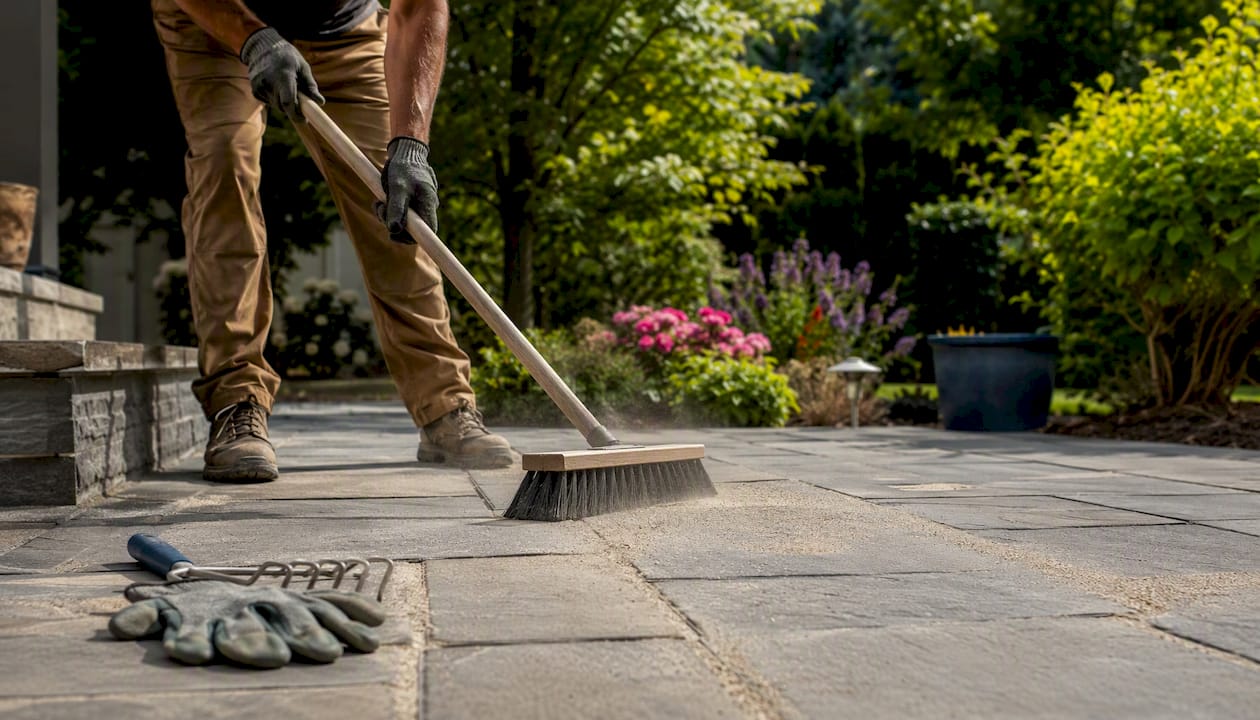
For most residential paver projects — patios, walkways, and driveways in Wake County — polymeric sand is usually the better joint filler where permeability is not a priority. For permeable paver systems or properties with stormwater/drainage requirements, regular or engineered jointing sand is preferred. It bonds when activated with water, resists washout, and blocks weeds far more effectively than mason sand. Regular (mason/joint) sand still makes sense for permeable installations, very wide or irregular joints, and projects where you expect to regrade or reposition pavers.
Key tradeoffs at a glance:
Polymeric sand: longer lifespan, weed and insect resistance, washout protection — but costs more, reduces drainage, and fails badly if installed incorrectly or in the wrong climate
Regular sand: lower cost, fully permeable, easy to rework — but washes out, invites weeds, and needs more frequent re-topping
Ready to skip the guesswork? Request a TrueSeal quote for a site evaluation. We assess your paver type, joint width, and drainage conditions before recommending a material — so you get the right product installed correctly the first time.
Pro Tip: If your current joints are crumbling, weedy, or washing out after every heavy rain, that’s a sign the original fill was wrong for your site — not just worn out. A material switch, done right, solves the problem for years.
Key Takeaways
Polymeric sand outperforms regular sand on durability, weed resistance, and washout protection for most residential paver projects, but correct installation and climate fit determine whether that performance actually shows up.
Point | Details |
Polymeric sand lifespan | Real-world performance commonly runs around five years; up to 10 years is possible with ideal conditions and correct installation. |
Regular sand maintenance | Mason or jointing sand typically needs re-topping every one to three years, making it costlier to maintain long-term. |
Permeability tradeoff | Polymeric sand reduces water infiltration — a real concern for properties with stormwater or drainage priorities. |
Installation is the deciding factor | Most polymeric sand failures trace back to poor prep, incorrect watering, or layering over old product rather than the material itself. |
TrueSeal for Wake County projects | TrueSeal handles polymeric sand replacement, paver cleaning, and sealing across Raleigh, Cary, Apex, Garner, and Wake County. |
Table of Contents
How do polymeric sand and regular sand compare?
The table below maps the two materials across the dimensions that actually drive a homeowner’s decision.
Dimension | Polymeric Sand | Regular (Mason/Joint) Sand |
Durability / longevity | High — bonds into a firm joint | Low — loosens and migrates over time |
Washout resistance | Excellent — resists rain and pressure washing | Poor — washes out with heavy rain |
Weed & insect resistance | Strong — bonded surface blocks growth and tunneling | Weak — weeds establish easily |
Permeability / drainage | Low — reduces water infiltration | High — water passes through freely |
Material cost | Higher (a few times more per square foot) | Lower (affordable per square foot) |
Joint width suitability | Best for narrow joints (1/4"–1.5") | Works in wider or irregular joints |
Ease of rework | Difficult — requires full removal | Easy — can be swept out and replaced |
Climate suitability | Risk of cracking in severe freeze-thaw; poor in very humid climates | Stable across climates |
Staining / efflorescence risk | Moderate — poly haze possible if misapplied | Lower risk, but efflorescence still occurs |
Maintenance / lifespan | Several years with proper install | Requires more frequent re-topping over time |
When to choose polymeric sand:
High-traffic patios, driveways, and pool decks where washout and weeds are recurring problems
Narrow paver joints (under 1.5") where a bonded fill provides the best interlock
When regular sand still makes sense:
Permeable paver systems where stormwater infiltration is a design requirement or local code priority
Wide or irregular joints (flagstone, natural stone) where polymeric sand struggles to bond consistently
Projects where pavers may need to be lifted and reset within a few years
What is polymeric sand and how does it work?
Polymeric sand is a blend of fine silica sand and polymer binders. When you sweep it into paver joints and mist it with water, the polymers activate and bind the sand particles together into a semi-rigid, cohesive joint. The result is a surface that resists rain, pressure washing, and foot traffic far better than loose sand ever could.
According to Today’s Homeowner, polymeric sand has been marketed since the late 1990s and typically includes fine silica sand with added polymers and sometimes Portland cement. Manufacturers claim lifespans of up to 10 years under ideal conditions, though real-world performance commonly runs around five years — a gap that usually comes down to installation quality and climate.
The curing window matters a great deal. After activation, the joint needs time to set before it sees rain or foot traffic. Sealing the paver surface too soon after polymeric sand installation traps moisture and can cause the joint to fail prematurely. Techniseal’s NOCO product documentation specifies activation and curing windows that govern exactly when a freshly sanded surface is ready for sealing — and those windows vary by formulation and ambient conditions.
What polymeric sand does well:
Blocks weed germination by eliminating the loose, open-pore environment seeds need
Resists insect tunneling (ants, in particular) that destabilizes paver interlock
Holds firm through rain events that would wash out mason sand within a season
Maintains joint integrity under foot traffic and moderate vehicle loads
TechniSeal is one of the most recognized manufacturers in the polymeric joint compound category, offering multiple formulations with different hardness levels and joint-width ratings. Some of their cementitious blends increase joint hardness but raise cracking risk in freeze-thaw conditions — a tradeoff worth understanding before you choose a product.
What is regular (mason) sand and when does it still make sense?
Mason sand — also sold as jointing sand or joint sand depending on the retailer — is a fine to medium silica or crushed stone aggregate with no binders. Unlike polymeric sand, it stays loose after installation. Water passes through it freely, pavers can be lifted and reset without damage, and the material costs a fraction of what polymeric products run.
HowToHardscape notes that engineered jointing sand uses angular or subangular grains specifically chosen for mechanical interlock. Those angular edges grip each other and the paver sides better than round, fine grains do — which is why true jointing sand outperforms generic play sand or beach sand even without any binder. That said, even well-graded jointing sand washes out over time without stabilization.
One labeling note worth knowing: “mason sand” and “jointing sand” are not always the same product at the hardware store. Mason sand is typically finer and more uniform, used in mortar and concrete work. Jointing sand is coarser and angular, graded specifically for paver joints. When buying for pavers, look for a product labeled for paver or hardscape use — not general-purpose mason sand, which can be too fine to lock properly.
Where regular sand still earns its place:
Permeable paver systems designed to let stormwater infiltrate rather than run off
Flagstone, natural stone, or large-format pavers with joints wider than 1.5" where polymeric sand bonds poorly
Temporary or frequently reworked installations (e.g., a patio you plan to expand or regrade)
Climates or microclimates where polymeric sand’s humidity sensitivity creates more problems than it solves
Head-to-head: which material wins on the criteria that matter most?
Durability and washout resistance
Polymeric sand wins here, and it’s not close. A properly installed polymeric joint holds up through seasons of rain, occasional pressure washing, and normal foot traffic. Mason sand, by contrast, migrates with every significant rain event. Homeowners who re-top mason sand joints every spring are essentially paying a recurring maintenance tax that polymeric sand eliminates — or at least defers significantly.
Weed and insect resistance
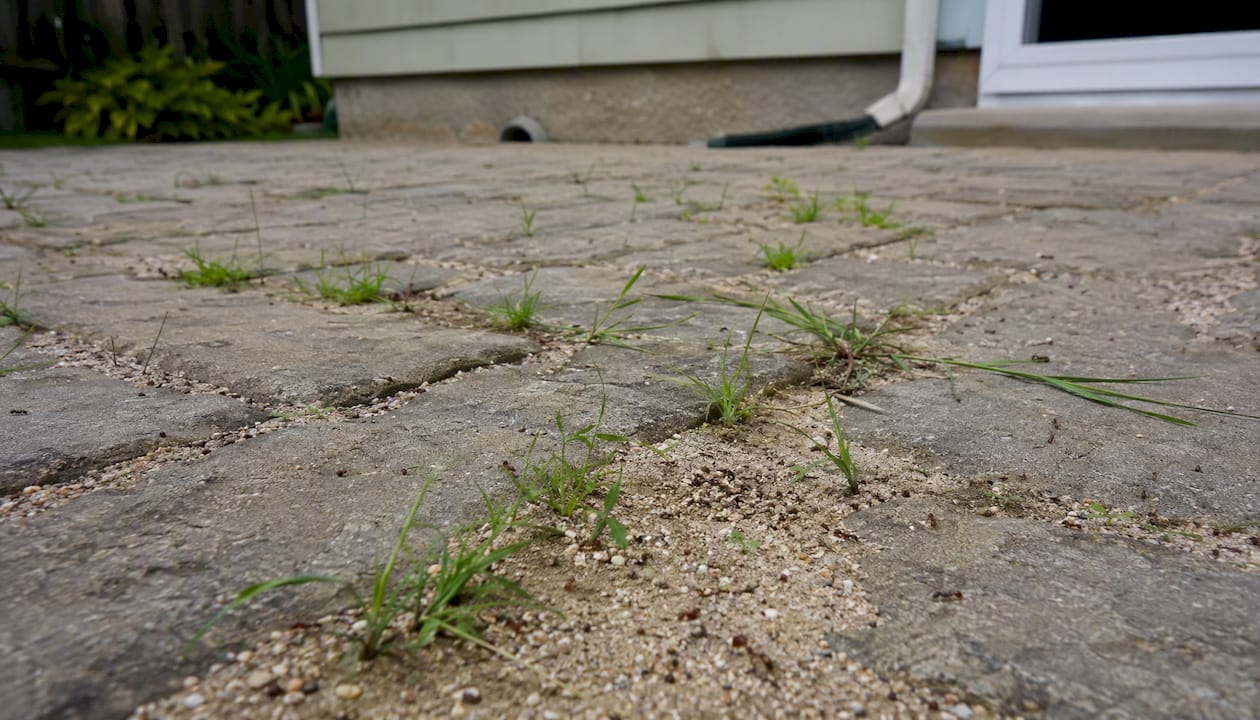
The bonded surface of polymeric sand leaves no loose, open pore space for weed seeds to germinate or ants to tunnel through. Mason sand joints, especially after a season of weathering, become prime real estate for crabgrass and fire ants. This is one of the clearest practical advantages polymeric sand delivers in the Raleigh and Wake County climate, where warm, wet summers accelerate weed establishment.
Permeability and stormwater
This is where polymeric sand’s biggest liability shows up. Because it reduces water infiltration, it can conflict with stormwater management goals — particularly in jurisdictions that encourage or require permeable hardscaping. Hillsborough County Extension (IFAS) specifically flags polymeric sand as conflicting with Florida-Friendly Landscaping™ Principle 8, which targets reduced stormwater runoff. While North Carolina has its own stormwater standards, the underlying principle applies anywhere: if your yard has drainage challenges or your HOA has stormwater requirements, permeable jointing sand may be the better call.
Cost
Material costs for polymeric sand typically run $0.50–$1.00 or more per square foot, compared with $0.10–$0.30 per square foot for mason or jointing sand. Labor costs for a correct polymeric sand installation run higher as well, because proper prep (joint cleaning, depth verification, compaction) takes more time. For local pricing context in Wake County, TrueSeal’s North Carolina paver sealing cost guide covers what homeowners typically pay for professional paver work in this market.
Climate suitability: freeze-thaw and humidity
Polymeric sand can crack in climates with severe freeze-thaw cycling. The bonded joint expands and contracts with temperature swings, and repeated cycles stress the material. In very humid climates, premature activation is a recurring problem — ambient moisture triggers the polymers before the sand is fully swept and compacted, locking in an uneven surface. Contractors in Florida report poly haze and premature breakdown as common issues, with full removal costing around $3 per square foot for chemical stripping and replacement. Wake County sits in a moderate climate, but humid summers and occasional hard freezes mean installation timing and product selection matter.
Joint width and surface suitability:
Narrow joints (1/4"–1.5"): polymeric sand is the clear choice — it fills and bonds tightly
Joints wider than 1.5": regular or coarse jointing sand performs more reliably; polymeric sand may not bond consistently across a wide gap
Irregular or natural stone: mason or jointing sand accommodates variable joint widths better
Heavy vehicle loads (driveways): polymeric sand with a cementitious formulation handles load better, but the base and bedding layer matter more than the joint fill
Key figure: Today’s Homeowner reports real-world polymeric sand lifespans commonly run around five years, even when manufacturers claim up to 10 years under ideal conditions.
How do you install polymeric sand correctly?
Installation quality determines whether polymeric sand lasts five years or fails in five months. Sakrete’s application guidance and professional contractor experience point to the same sequence every time.
Clean the joints thoroughly. Remove all existing joint material, weeds, debris, and old polymeric sand. Do not skip this step. Layering new polymeric sand over old cured product almost always fails — the new polymers cannot bond to a cured polymer layer. Unilock confirms that topping off old joints is one of the most common causes of premature failure.
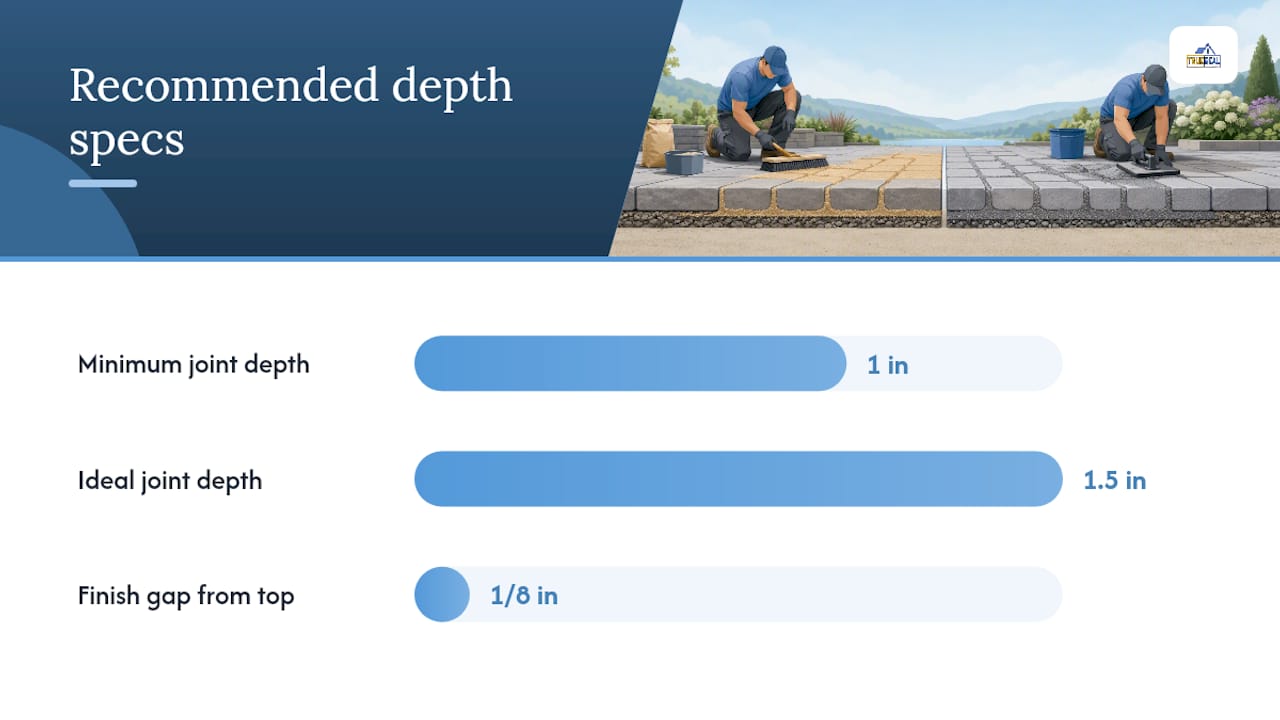
Check joint depth. Joints should be at least 1" deep (ideally 1.5") before filling. Shallow joints don’t hold enough material to bond properly.
Sweep dry sand into joints. Work in multiple passes, sweeping diagonally across the paver surface. Fill joints to within 1/8" of the paver top — not flush, not overfilled.
Compact with a plate compactor. Run a compactor (with a protective pad) over the surface to settle the sand into the joints. Sweep again to refill any voids.
Remove excess sand from paver faces. Blow or sweep all surface sand off the pavers before activation. Any sand left on the surface will bond there and create poly haze.
Activate with water. Mist the surface gently — do not flood it. Follow the manufacturer’s specified watering sequence (typically two light passes). Over-watering washes polymers out of the joint; under-watering leaves the binder incompletely activated.
Allow full curing before sealing or traffic. Most products need 24–48 hours of dry weather after activation before foot traffic and significantly longer before sealing. Check the specific product’s curing window — Techniseal’s NOCO formulation documents these windows explicitly.
Common mistakes that ruin the job:
Installing on a humid day or when rain is forecast within 24 hours
Leaving sand on paver faces before watering (causes permanent poly haze)
Over-watering and washing polymers out of the joint
Sealing the paver surface before the joint has fully cured
Topping off old polymeric sand instead of removing it first
Pro Tip: Check the 72-hour weather forecast before you start. You need dry conditions during installation and for at least 24 hours after activation. In Wake County’s humid summers, early morning installs on low-humidity days give you the best window.
How long does polymeric sand last, and what maintenance does it need?
Realistic lifespan for polymeric sand runs five years under normal residential conditions, with well-installed joints in favorable climates potentially reaching the manufacturer’s 10-year claim. Mason sand needs re-topping every one to three years in most climates. The gap in maintenance frequency is one of the strongest arguments for polymeric sand’s higher upfront cost.
Maintenance checklist by season:
Spring: Inspect joints for cracking, voids, or weed breakthrough. Address small voids early before water infiltrates and undermines the base.
Summer: Check for ant activity along joint lines — a sign the bond has weakened or was never fully established.
Fall: Clear leaf debris from joints; standing organic matter accelerates joint breakdown and staining.
After any major storm: Walk the surface and look for washout at edges and low points. Polymeric sand joints should show no material displacement after normal rain.
Signs it’s time to call a pro:
Joints are crumbling, cracking, or showing visible voids across more than 20% of the surface
Persistent weed growth through joints that were previously clear
Pavers rocking or shifting (a sign the joint has lost interlock and the base may be compromised)
Efflorescence or staining that doesn’t respond to basic cleaning
Any area where the original polymeric sand was incorrectly installed and needs full removal
For a deeper look at restoring faded or failing pavers, TrueSeal’s process covers cleaning, re-sanding, and sealing as a combined workflow — because addressing joints without sealing the surface afterward leaves the restoration incomplete.
What are the most common polymeric sand problems and how do you fix them?
Poly haze
Poly haze is a milky or cloudy film bonded to paver faces after activation. It happens when excess sand wasn’t fully removed before watering. Mild haze sometimes responds to a light scrub with a stiff brush and water. Severe haze requires a chemical stripper or mechanical grinding — neither is a quick fix. Prevention is the only real answer: blow or sweep every paver face completely clean before you touch the hose.
Efflorescence
White, chalky deposits on paver surfaces come from soluble salts migrating through the joint material and crystallizing on the surface. Polymeric sand with cementitious content can contribute to efflorescence, particularly in the first season. TrueSeal’s efflorescence guide covers safe removal methods and how sealing after treatment prevents recurrence.
Cracking and joint loss
Cracking usually points to one of three causes: freeze-thaw stress on a cementitious formulation, an under-watered activation that left the joint brittle, or a base failure that’s allowing pavers to shift. Small surface cracks can sometimes be addressed by carefully removing the cracked material and re-filling. Widespread cracking across a large area almost always means full removal and reinstallation.
Step-by-step for addressing failed polymeric sand:
Identify the failure mode (haze, cracking, washout, or peeling) before deciding on a fix.
For haze: try a mild detergent scrub first; escalate to a commercial polymeric sand remover if needed.
For cracking or joint loss: remove all failed material mechanically (oscillating tool, chisel, or pressure washer at close range) before any re-fill.
For efflorescence: apply an efflorescence cleaner, rinse thoroughly, and allow to dry completely before re-sanding.
For widespread failure: contact a professional. Full removal and reinstallation on a large driveway or patio is not a practical DIY project.
When to call TrueSeal instead of attempting a fix:
Poly haze covers more than a small section and chemical strippers are involved
The joint failure is accompanied by paver movement or base settlement
You’re dealing with a large surface (over 200 sq ft) where incorrect removal could damage the pavers
Previous DIY repairs have already failed once
For a full breakdown of polymeric sand problems, causes, and fixes, TrueSeal’s guide walks through each failure type with specific remediation steps.
Are there alternatives beyond polymeric and mason sand?
Yes, and for some projects they’re the right call.
Permeable paver sand (chip stone or angular aggregate): Designed specifically for permeable paver systems. Coarse, angular, and open-graded — water passes through freely. The right choice when stormwater infiltration is a design goal or local code requirement.
Crushed stone mixes (decomposed granite, chip gravel): Used in wide-joint natural stone installations. Not a bonded joint, but durable and permeable. Works well for flagstone paths where polymeric sand can’t bridge the gap width.
Joint stabilizing sealers (regular sand + sealer): A hybrid approach where mason sand is swept in and then a penetrating joint stabilizer is applied over the surface. Less rigid than polymeric sand, more permeable, and easier to rework. Useful for older patios where full joint replacement isn’t practical.
Mechanical joint stabilizers: Proprietary products that use a different binder chemistry than standard polymeric sand. Some are designed specifically for humid climates where standard polymeric products fail prematurely.
When a hybrid approach makes sense: If your patio has wide joints (over 1.5") but you still want some weed resistance, a joint stabilizing sealer over coarse jointing sand gives you a middle ground. It won’t match the durability of a properly installed polymeric joint, but it outperforms bare mason sand and stays permeable.
Environmental and stormwater considerations are worth taking seriously. If your property drains toward a creek, pond, or storm drain, reducing infiltration with polymeric sand adds to runoff volume. Permeable jointing options keep more water on-site and reduce the load on municipal stormwater systems — a practical consideration for Wake County properties near natural drainage areas.
When should you hire a pro instead of doing it yourself?
Some polymeric sand jobs are genuinely DIY-friendly: a small patio with clean, consistent joints and a cooperative weather forecast. Many are not. The jobs that go wrong most often are the ones where a homeowner underestimates prep time, installs on a humid afternoon, or skips the compaction step.
Jobs best left to a professional:
Large driveways or commercial surfaces where a plate compactor and professional-grade blowers are needed for consistent results
Any surface where old polymeric sand needs full removal before reinstallation
Projects with paver movement or base issues that need correction before re-sanding
Surfaces in shaded or chronically damp areas where humidity control during installation is critical
TrueSeal handles the full workflow for Wake County homeowners and property managers: joint cleaning, old sand removal, fresh polymeric sand installation, and paver sealing as a combined service. That matters because sealing the surface after re-sanding protects both the joint and the paver face from staining, UV fading, and moisture intrusion.
TrueSeal’s service advantages for local projects:
Remote assessment option — send photos and get a tailored recommendation without waiting for an on-site visit
Polymeric sand replacement as a standalone service or combined with paver cleaning and sealing
Efflorescence remediation before re-sanding, so the new joint starts on a clean surface
Service coverage across Raleigh, Cary, Apex, Garner, and Wake County
Pro Tip: For a driveway that sees vehicle traffic, ask your contractor whether the polymeric sand formulation they’re using is rated for vehicular load. Not all products are — and using a pedestrian-grade product under cars accelerates joint failure significantly.
Find a paver sealing company near you in Wake County to compare what professional service includes versus a DIY approach.
The contractor’s honest take on which material we choose
Polymeric sand is our default recommendation for most residential projects in Wake County — patios, pool decks, and walkways where weeds and washout are the primary complaints. The bonded joint simply holds up better through our humid summers and the occasional hard freeze we see in Raleigh and Cary.
That said, we don’t use it everywhere. For a flagstone patio with wide, irregular joints, we’ll reach for a coarse jointing sand or a hybrid stabilizer approach instead — polymeric sand won’t bond consistently across a 2" gap, and forcing it creates a surface that looks patchy and fails faster than mason sand would. For a driveway with a drainage swale running through the yard, we’ll have a conversation about permeability before we recommend anything.
The honest truth is that the material matters less than the prep. We’ve seen polymeric sand fail in two seasons because the joints weren’t cleaned properly and the old product wasn’t removed. We’ve also seen mason sand hold reasonably well for four or five years in a shaded, low-traffic courtyard where the conditions happened to be right. Installation quality is the variable that separates a five-year joint from a five-month one.
TrueSeal’s paver services for Wake County homeowners
Choosing the right joint material is only half the equation. A correct installation — with proper prep, the right product for your specific pavers and climate, and a sealed surface to protect the investment — is what actually delivers lasting results.
[
TrueSeal provides paver cleaning, polymeric sand replacement, and sealing as a combined service for residential and commercial properties across Raleigh, Cary, Apex, Garner, and Wake County. Our remote assessment process means you can send photos of your paver surface and get a specific recommendation and quote without scheduling an on-site visit first.
Services include polymeric sand replacement, efflorescence remediation, paver cleaning and sealing, and long-term surface protection that extends the life of your hardscape. Whether you’re dealing with failed joints on a 10-year-old driveway or planning a new patio installation, request a quote through our concrete and pavement services page to get started.
Sources
FAQ
Should you use polymeric sand or regular sand for pavers?
Polymeric sand is the better choice for most residential paver projects where permeability is not the main requirement, because it resists washout, blocks weeds, and lasts significantly longer than mason sand. Regular sand makes more sense for permeable systems, wide or irregular joints, or installations that may need to be reworked.
What are the main disadvantages of polymeric sand?
Polymeric sand costs more upfront, reduces drainage, and fails badly when installed incorrectly — common problems include poly haze, cracking in freeze-thaw conditions, and premature activation in humid climates. Real-world lifespan commonly runs around five years, not the 10 years some manufacturers claim.
Why is polymeric sand not recommended in Florida?
Florida’s high humidity causes polymeric sand to activate prematurely before it’s fully swept and compacted, resulting in poly haze and uneven bonding. Full removal of failed polymeric sand in that climate can cost around $3 per square foot for chemical stripping and replacement, making it a costly mistake.
Is there anything better than polymeric sand for paver joints?
For permeable installations, coarse angular jointing sand or engineered permeable paver aggregate outperforms polymeric sand because it maintains drainage. For standard patios and walkways, a hybrid approach using jointing sand with a joint stabilizing sealer offers more flexibility than polymeric sand with similar weed resistance, though less durability.
How soon can you seal pavers after applying polymeric sand?
Curing time varies by product and conditions, but most polymeric sand formulations require at least 24–48 hours of dry weather after activation before foot traffic and longer before sealing. Sealing too soon traps moisture in the joint and causes premature failure — always check the manufacturer’s specific curing window before scheduling a sealer application.
Comments